Customer Portal
| How do I get here? |
TBS Login screen ► Account Number | Password *Customers use the same login screen as regular TBS users |
| Purpose |
Customers log in using their Account Number and password. Customer passwords can be set using the Actions tab within the Customer module. The Customer Portal provides:
|
| Security |
Please see the Customer Portal Menu documentation as well as the Security & Permissions section below. Access to the Customer portal is for "Standard" type customers or T4Users that have been flagged as type=Customer. Customers can be denied access using certain Customer Statuses. See How do I stop a customer from accessing the customer portal FAQ. Note: "Wholesale" customers have a separate Wholesale portal. "COOP" customers optionally may be directed to the COOP portal. |
| Taxing Impact | N/A |
| Commission Impact | N/A |
| Data Field Definitions | N/A |
Corporate Portal View
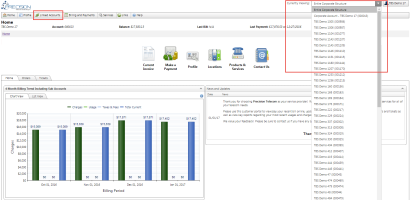
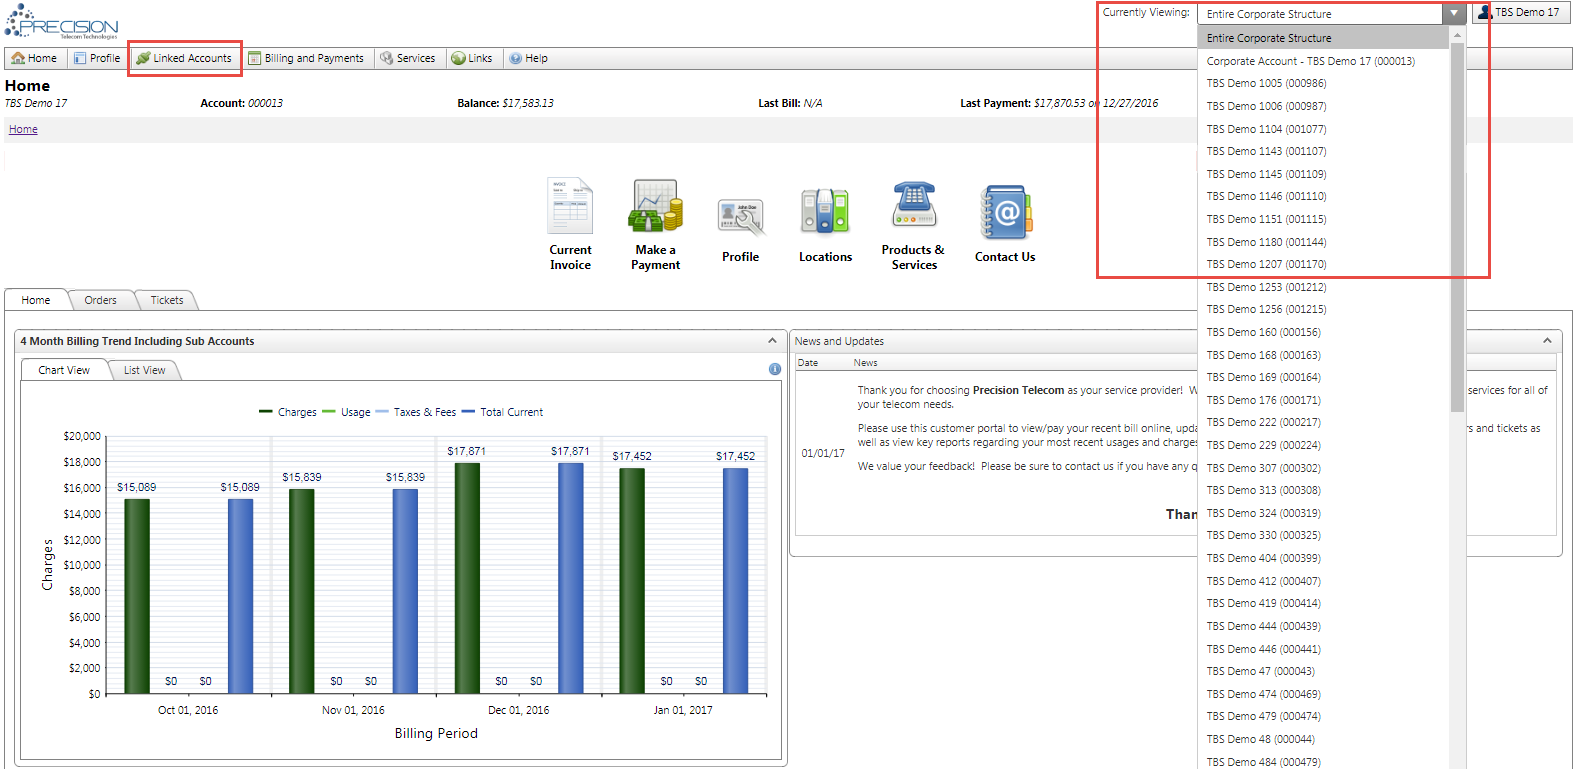
The Customer portal supports both Standard and Corporate accounts. For Standard accounts, all information shown is for the Standard account. For Corporate parents, the ability to view their sub account detail information is available from a "Currently Viewing" selection box that appears at the top right. This allows the corporate account to view the Entire Corporate View or select an individual sub account.
The items that this control interacts with include the Locations list, Trouble/Task Tickets, Orders list, Products list, Account information, and Billing Statements.
A "Linked Accounts" menu will also be available for Corporate parents. This will show a complete list of accounts in the Corporate / Sub structure.
The customer that is logged in must have "Corporate" as their billing type, and must be the top level account (its AccountNumber is the same as its CorpAccountNumber.)
Home Dashboard
Standard Account:
Corporate Parent Account:
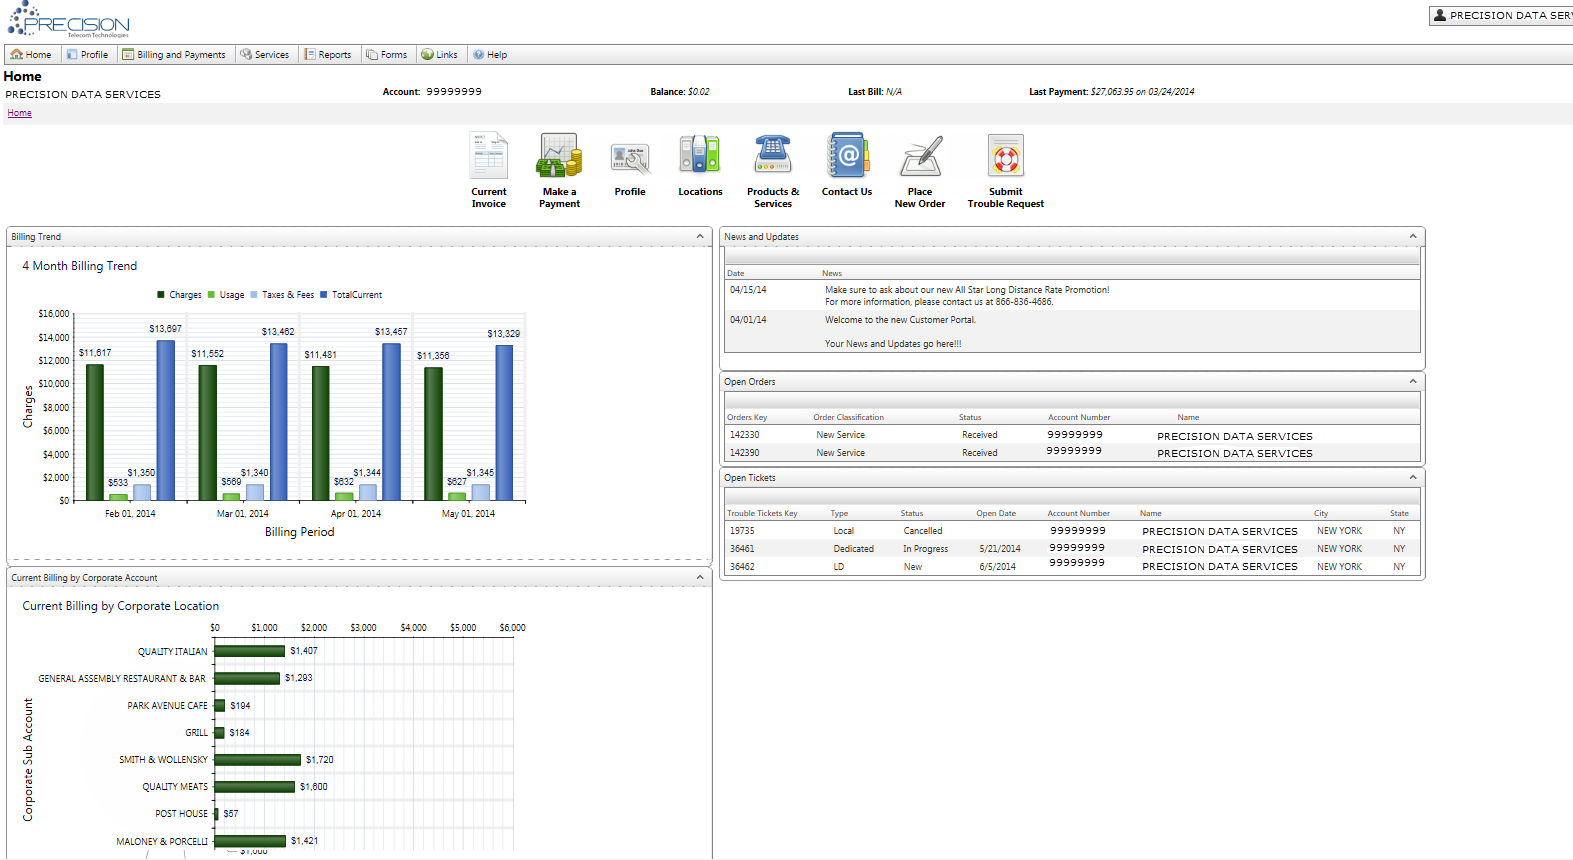
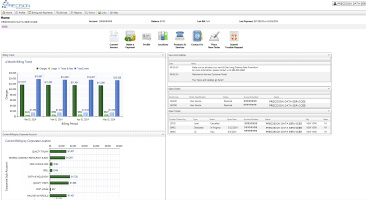
The Home Dashboard provides customers with a snapshot of their account activity including:
- 4 Month Billing Trend Chart - This chart shows the Charges, Usage, Taxes & Fees, and Total Current Billing over the past 4 months.
- Current Billing by Location - This chart shows the Total Current Billing by Location. The data is slightly different based on the Account Type
- Standard Accounts - The chart shows Locations under the current account.
- Corporate Accounts - The chart shows the Corporate / Sub Account Location information.
- News and Updates - This element shows all current News and Updates items.
- Open Orders - This element provides a list of Open Orders on the account.
- Open Tickets - This element provides a list of Open Trouble Tickets on the account.
In addition, the Home Dashboard provides quick link icons to help the customer quickly access the most commonly used features of the portal.
Users navigate the portal using the quick link icons or the menu.
Profile

The Profile page is used by customers to view and manage their Account Profile. Subsections of this page include:
- Contact Information - Bill To Location
- Email Addresses - Email Addresses for Billing Notices and Payment Confirmation Notices
- Invoice Delivery - Settings to allow users to receive Paper and / or Email Invoices
- Security Questions - To help verify customer identity on CS calls
- Security Code - Alternative to Security Questions. If set will display a notification on the account for internal users
- User Settings & Change Password
Billing and Payments
Billing - The Billing section is used to provide customers with the ability to view invoices and accounting transactions. The supplemental tabs are:
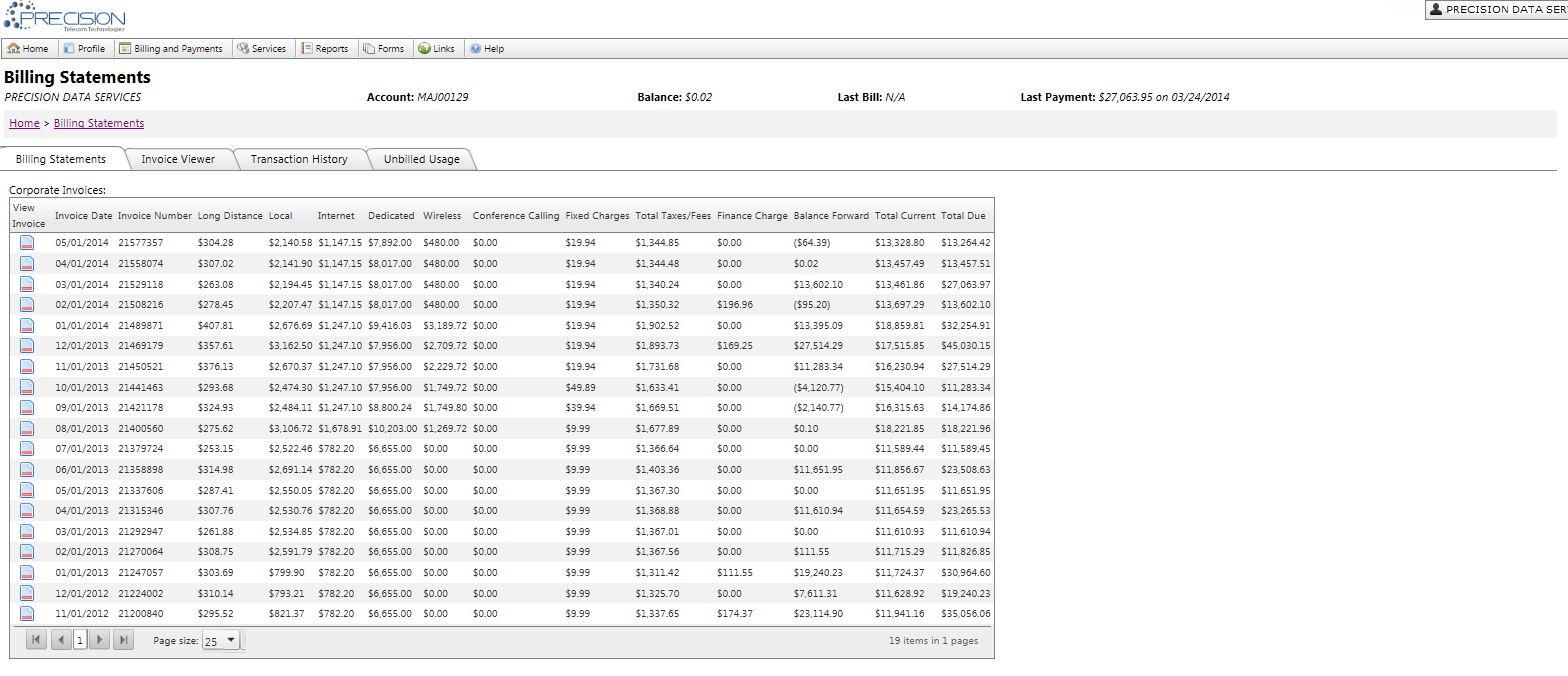
● Billing Statements - Provides a list of all invoicing history for the account. Clicking the “View Invoice” icon will direct the user to the Invoice Viewer with the correct Invoice selected.
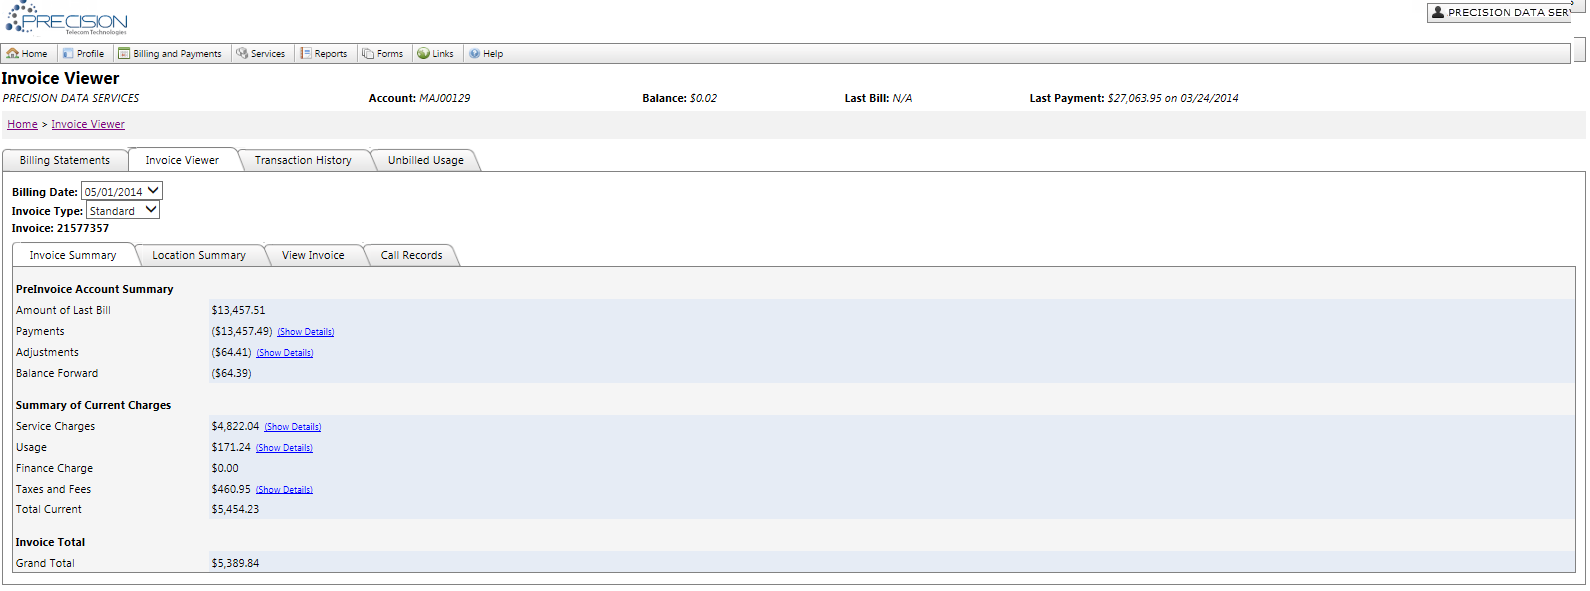
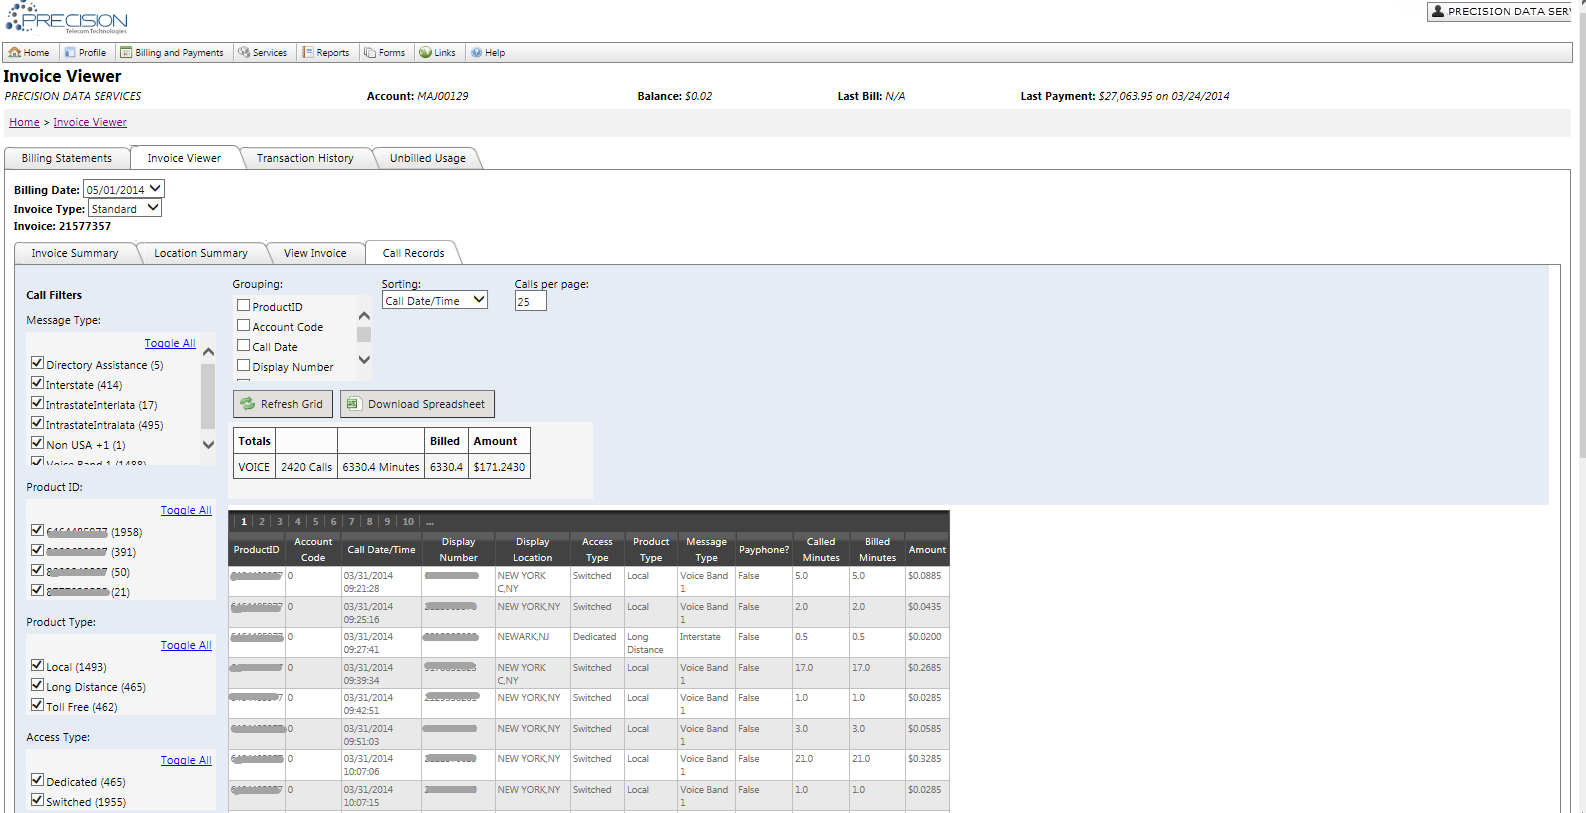
● Invoice Viewer - Provides access to the interactive invoice viewer as well as additional tabs for the Invoice Summary, Location Summary, PDF invoice and to download CDRs (Call Data Records) for the selected billing cycle. Customers can jump between months using the Billing Cycle drop down.
The Invoice Viewer has "Show Details / Hide Details" links to expand details of the billing. This is available on the Invoice Summary and Location Summary tabs. The Location Summary tab will break down the details by product if more detail is desired.
The Invoice Viewer and supplemental tabs are also found inside the main TBS system. For more information on their functionality, please review the Invoice Viewer V2 help topic.
● Transaction History - Provides a list of all accounting transactions for the account. Accounting transactions consist of Charges, Payments, Credits and Debits. Clicking the “View Invoice” icon on any Charge transaction will direct the user to the Invoice Viewer with the correct invoice selected.
● Unbilled Usage - Customers can view any phone calls that have been made and processed during the daily TBS call rating process. These calls may be slightly delayed depending on when the calls are retrieved from the carrier. The rating shown is based on the rates as of the day the call is processed.
Payments
The Payments section is used to provide clients with the ability to set up their Credit Cards, ACH (Bank) Accounts, make payments and manage their automatic payment settings.
The Payments section and supplemental tabs are also found inside the main TBS system. For more information on their functionality, please review the Credit Cards, Bank Accounts, Automatic Payments and Pay Bill help topics.
Customers can be configured to have additional restrictions such as:
- Cannot Delete Payment Accounts
- Cannot Remove themselves from Recurring
- Sign up for Bank Account Recurring payments without a signed NACHA form on file
The supplemental tabs are
- Automatic Payments - Use to set up, change or remove Recurring Payments.
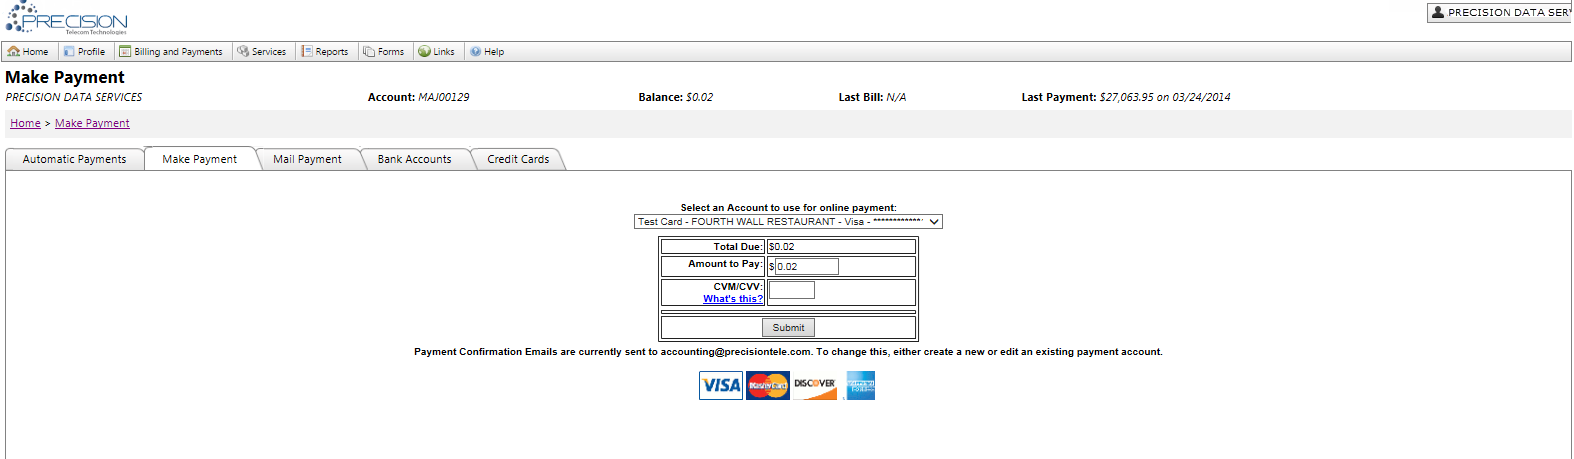
- Make Payment - Quickly process a Credit Card or ACH payment using existing Cards and/or Bank Accounts.
- Mail Payment - Provides US Mailing address for payments.
- Bank Accounts - Manage ACH (Bank) Accounts.
- Credit Cards - Manage Credit Card Accounts.
Services
The Services section provides customers with detailed information about the Products and Services set up on the account. The following sub sections are provided:
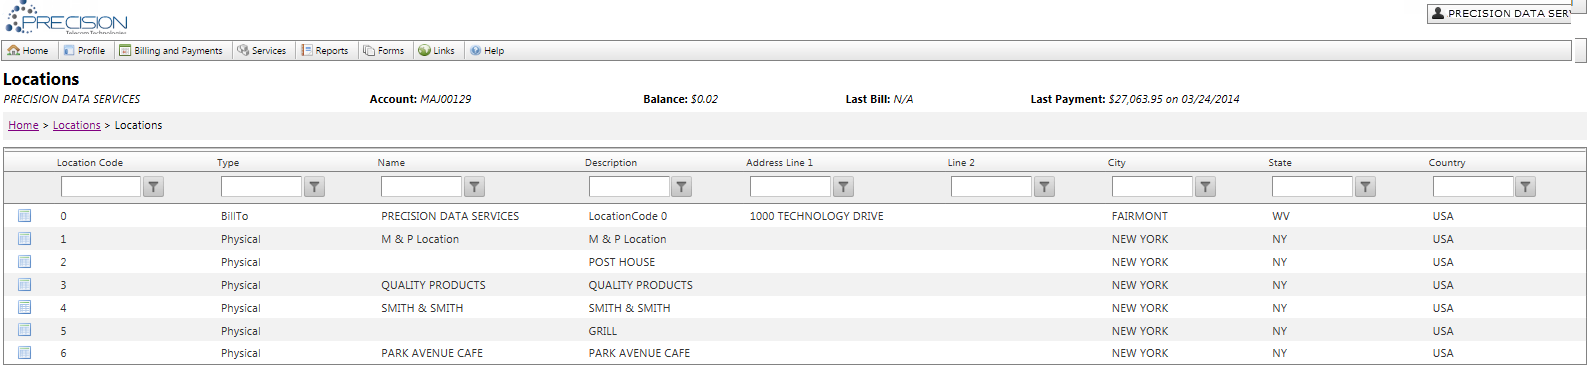
● Locations - provides a list of all Locations defined on the current account. Locations are used to group products on the invoice. They can also be used to specify the actual Physical Location of a product. One of the Locations will be marked as the “Bill To” and is used to store the Billing Location for the account.
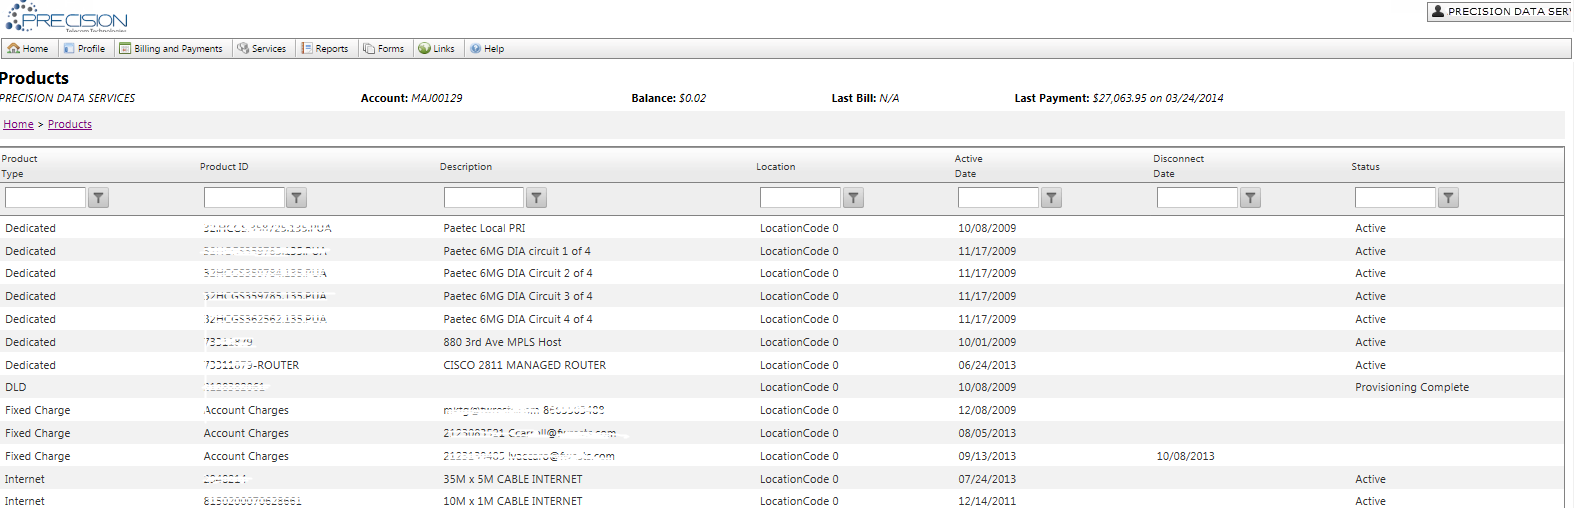
● Products - provides a list of all Products on the current account.
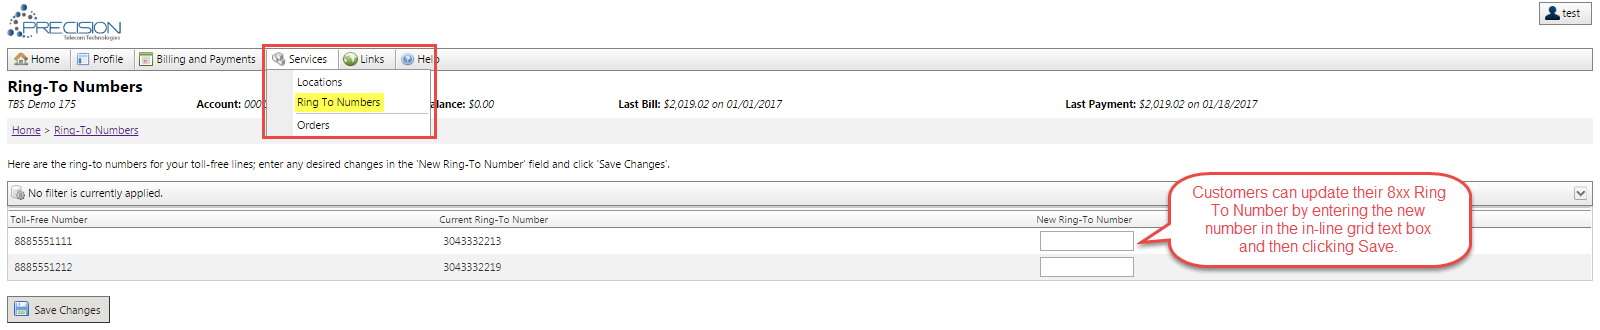
● Ring To Number Change - There is a option, Show Ring To Number Interface, on the Customer Base admin screen.
On the Customer Portal, if this is set and a customer has active products where the BTN is not null and the product's Service Type is 8xx, a "Ring To Numbers" option is available from the Services menu.
The Ring To Numbers screen lists these 8xx products and allows them to enter new Ring To Numbers. Changes will:
- Change the BTN (Ring To Number) on the product.
- Set the CareProvisioning_Action to "Change" on any Charges/Plans whose inventory record has either Interstate Care Provisioning or Intrastate Care Provisioning set to true.
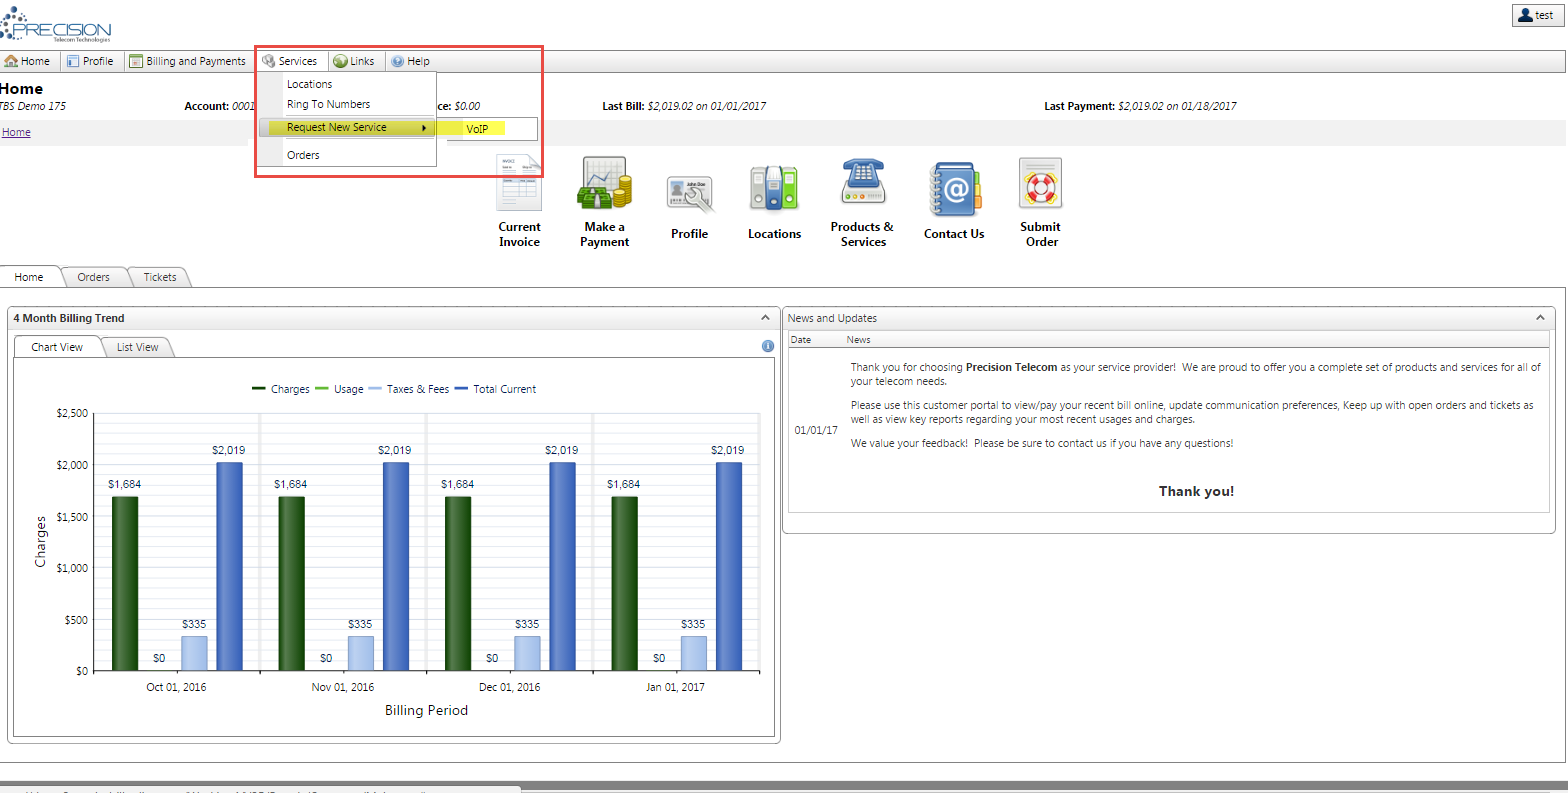
● Request New Service - A Request New Service Feature can now be available from the Services menu of the Customer Portal. To configure this option, the Client must use Tasks and also Integrated Product Types.
Users can set a new option, Task Type For New Service, on the Product Type admin screen. Setting this will show a new option in the Customer Portal Services menu allowing customers to request new service and result in a new Task of the type selected on the Product Type screen. For Example, a Voice-VoIP product type would point to a VoIP Task Type for New Service. This would result in a new VoIP Task being generated if a customer used this new feature from the portal. Customers will also need Add access to the permission module tied to the particular Task Type set on the Product Type screen.

From the Customer Portal, the Request New Service screen allows customers to enter a list of Product IDs, select a location (if the task type has locations enabled), and provide contact information for the request.
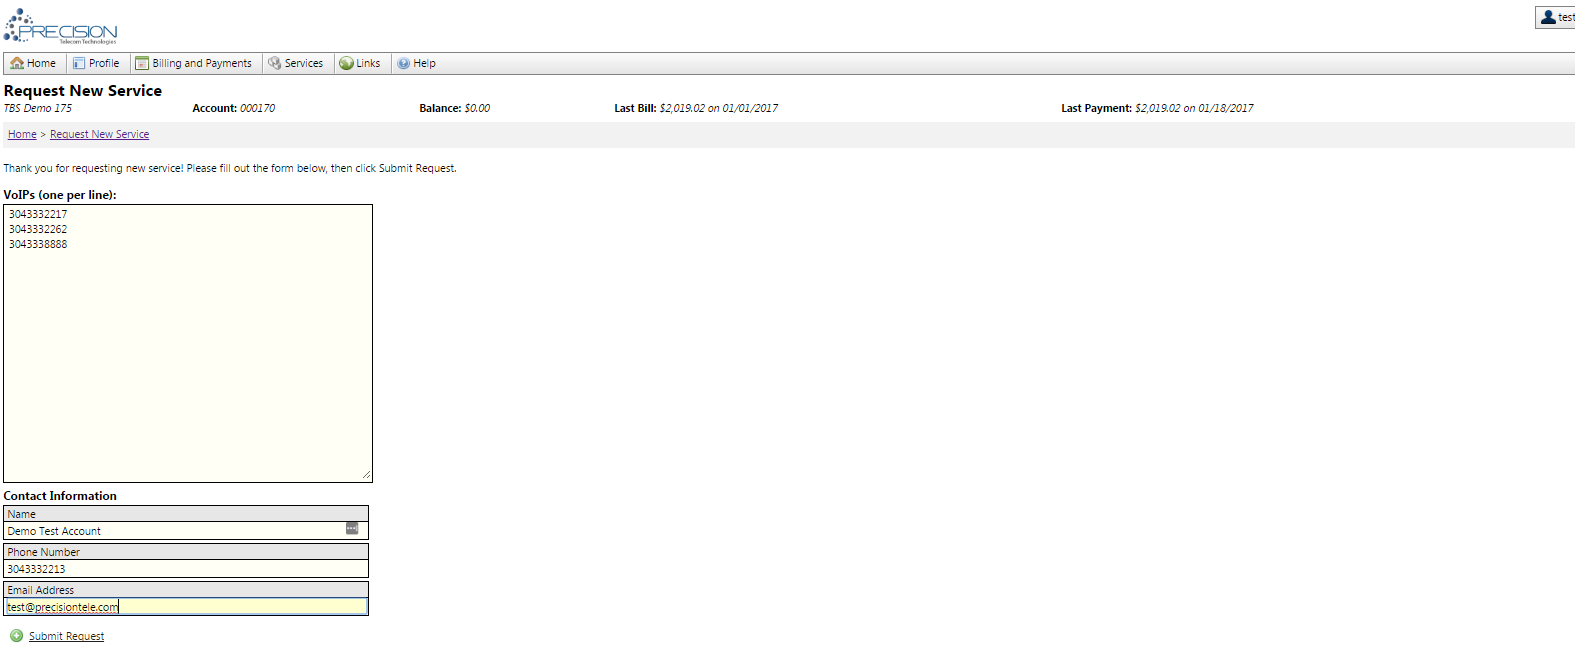
Once submitted, a new Task of the requested Task Type will be created. The description of the Task type will show the lines requested by the customer via the portal. This Task can then be picked up and worked as needed. Notifications for these Tasks can be configured as well. Please work with your Client Solutions Expert to configure these.

● Orders - provides a list of Orders for the current account. By default, the system filters this grid to show only “Open” orders. Clearing this filter will display all Orders to the user.

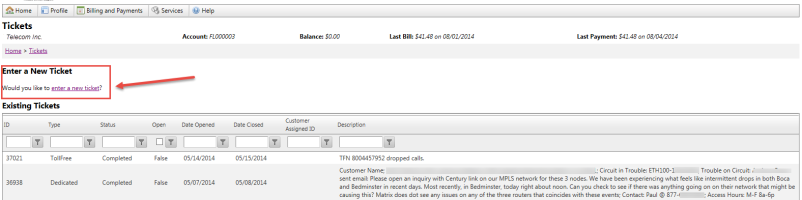
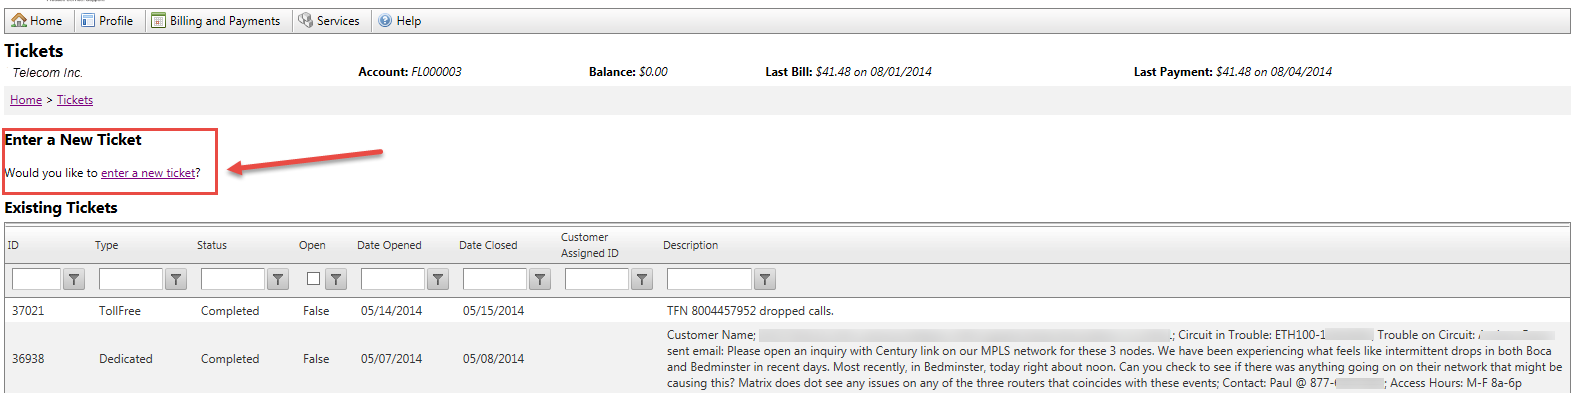
● Tickets - provides a list of Trouble Tickets for the current account as well as ability to initiate a new ticket. By default, the system filters this grid to show only “Open” Tickets. Clearing this filter will display all Tickets to the user.
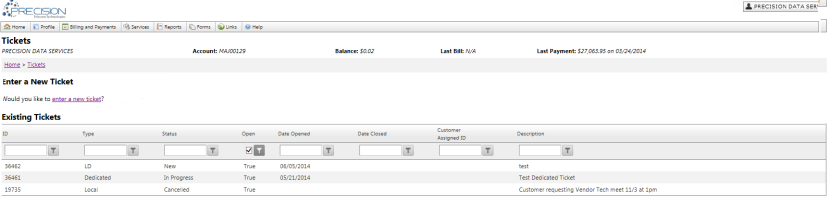
Add New Ticket Feature:
There are two ways customers can initiate a new trouble ticket:
- The Submit Trouble Ticket icon on the Customer Portal Home page

- From a new link on the Customer Portal Tickets page
The tool only allows tickets to be entered for active products based on the product's Active and Disconnect dates. Traditional products that do not have active or disconnect dates (e.g., Voicemail) are presumed to be Active.
For a customer to enter a new trouble ticket, they must:
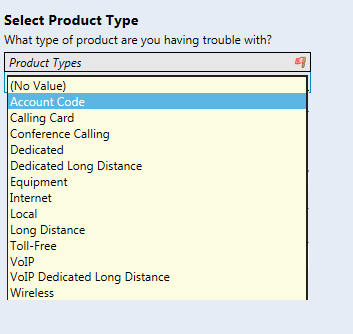
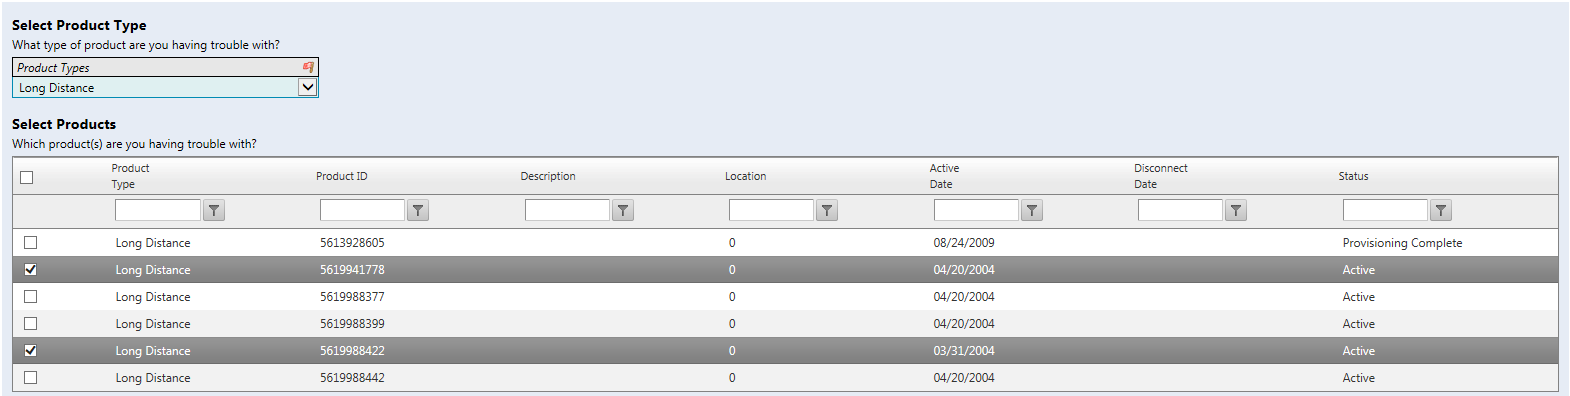
- Select the Product Type. The Product Type drop-down list is limited to active product types on the account. Once selected, only products of that type will show in the products grid.
- Select all of the Products that they are having trouble with in the products grid. The product grid is filtered to active products on the product type selected. Any selected productIDs will be added to the trouble ticket description field on Save.
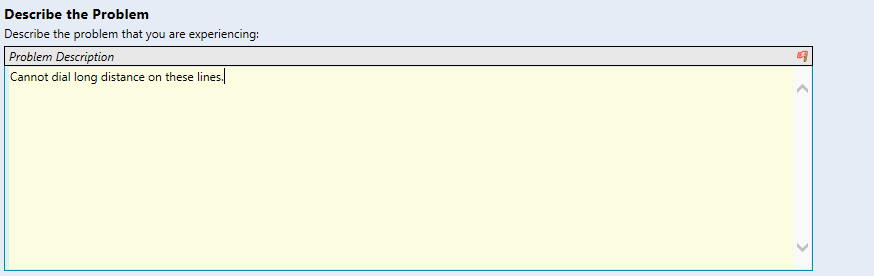
- Enter a description of the problem.
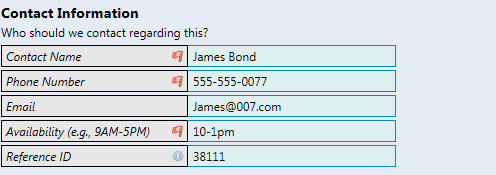
- Enter a callback name, phone number, and availability.
- Click the Submit Ticket button. A confirmation will appear along with the Ticket number.
- The trouble ticket is also now viewable in the main trouble tickets grid.


● Network Resource(s) / External Pages - The Services Menu will provide a link to External Pages that have been defined as Network Resources AND that have been specifically coded to be included on the Customer Portal. The most common example is the integration of TBS to an external site (DID Portal, 911 Portal, etc).
● Customized Links - A menu option will be created for every Custom Link record that has the “Customer Visible” flag checked where the Location is “ServiceMenu”.
Reporting
The Reports Menu is dynamically built and completely controlled by the client. This menu item will not be displayed if no reports have been configure to appear on the portal. Simply assign the “CustomerPortal” module to any Flex Report and the report will be displayed in the menu
Forms
Clients can use the Download Forms tools to made documents available for download on the Customer Portal. This feature is useful to make forms such as ACH Authorization forms available for the customer to print and return to the Client.
Links
The Links Menu is dynamically build and completely controlled by the client. A menu option will be created for every Custom Link record that has the “Customer Visible” flag checked where the Location is “CustomLinksMenu”. If no Custom Link records exist, this menu will not be displayed.
Help
- Contact Us - provides the customer with contact information for:
- Customer Service phone, email and address
- Payment Address
- Other Address
This information is pulled from the “Base” record associated with the Customer’s Account.
- Custom Links - A menu option will be created for every Custom Link record that has the “Customer Visible” flag checked where the Location is “HelpMenu”.
Other Features
The Customer Portal includes the following optional features:
- Terms and Conditions Acceptance - Optionally, the system supports the forcing the acceptance of Terms and Conditions. The link to the Terms and Conditions is set in Custom Links with a Location of “AcceptTermsPage”. When the user accepts, the IP Address and current Date/Time are stored on the Customer record under the Custom Fields tab. For administrators, there is a “Clear Term Acceptance” button on the Base Record that will clear the user acceptance information for all accounts associated with the selected Base. This is typically used when posting new Terms and Conditions and will force all Customers to again Accept the terms when logging into the portal
- Customized Styles - Clients that want to customize the colors, fonts, and other formatting styles can create a CSS (Cascading Style Sheet) to be associated with each Base.
- Social Media Links - Clients can enable Social Media links for each Base. Facebook, LinkedIn, Google+ and Twitter are currently supported.
-
Email Addresses - OrdersEmail and CustomerServiceEmail (from the Base record) are used as the email addresses for the “Place New Order” Icon. TroubleRepairEmail and CustomerServiceEmail (from the Base record) are used as the email address for the “New Ticket Request” icon
Security & Permission Considerations
New permissions modules have been created to allow for the fine tuning of access for accounts. To manage permissions navigate to Utilities->System Administration Menu; Users & Security.
- Users and Security -> Users page - all clients have a “GenericCustomer” or “Customer” User ID. When a Customer Account User logs into the system, they are assigned the rights based on this GenericCustomer User. Typically, this user is assigned a single “Customers” group (described below). We recommend that any permission changes by applied directly to the Customers group.
- Users and Security -> Groups page, all clients have a “Customers” security group. This Group allows for the assignment of various Security Modules. These Modules control visibility and access to the various elements of the Customer Portal. The Modules used for the Customer Portal are listed below along with how each affects the portal:
- Customers_CustomerLevel
- Customer Portal Home Dashboard
- Billing and Payments Menu
- Profile Section (edit rights are required to allow users to change profile information).
- Locations_CustomerLevel
- Locations Grid
- Update rights will allow users to link to the “Bill To” Location from the Profile Page so they can “Change Contact Information”
When a user updates a location record, any associated Network Resources (Enable 911 for example) will be updated accordingly.
- Orders_CustomerLevel
- Open Orders List on the Home Dashboard
- Services -> Orders Grid
At this time, Add, Update, Delete rights to this module have no effect.
- Products_CustomerLevel
- Products Grid
At this time, Add, Update, Delete rights to this module have no effect.
- Products Grid
- TroubleTickets_CustomerLevel
- Open Tickets List on the Home Dashboard
- Services -> Tickets Grid
At this time, Add, Update, Delete rights to this module have no effect.
- CustomerPortal
- Provides access to Flex Reports via the Customer Portal Menu.
- Customers_CustomerLevel
Network Resource Integration
Network Resource Integration is similar to Custom Links. The difference is that Custom Links provides a way to allow the user to navigate to external sites from TBS. Network Resources are used when code is required to tightly integrate with an external API. For example, linking to a partner sites that allows for the Ordering and Provisioning of Numbers; or integration with an E911 Provider.
Please note: this is different than Customized Links. Customized Links are simple links to other pages. Network Resources requires links and customized development code to function properly.
Application Settings
-
InvoiceDeliverySettingsAreReadOnlyForCustomers - setting this to true will force the Invoice Delivery Options to be Read Only even for accounts with Edit Permissions to Customers_CustomerLevel. -
CustomerAlerts_ShowDaysLate - An “Account is X days past due” notice will be displayed to the user if their Days Late is greater than the value in this appsetting. Setting this value to 0 will suppress the message.